Aug 3, 2026Food Labels
How to Avoid Barcode Scanning Failures During Custom Food Label Design
Learn how to prevent barcode scanning failures during custom food label design by checking barcode quality, using single-black artwork, leaving die-cutting clearance, and avoiding tightly curved areas
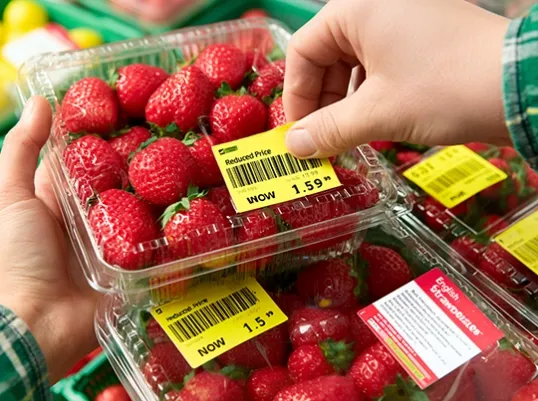
A few days ago, a designer working for one of our food manufacturing customers contacted me with a question:
“What should I do to prevent the barcode from becoming unscannable?”
When I received the message, I immediately wanted to give the designer credit.
During my years in the label printing industry, we have encountered many customers whose barcodes could not be scanned properly. In many cases, we did not discover the cause until the customer sent us the final production artwork.
This was the first time a customer’s designer had contacted the food label printer during the design stage to confirm the barcode requirements before approving the artwork.
To be honest, this is exactly how the custom label design and printing process should work.
Barcode scanning problems should not be considered only after the labels have already been printed. Designers, food manufacturers, and label printers should communicate before production so that potential problems can be identified while the artwork can still be adjusted.
Based on our printing experience, the following four issues should be considered during custom food label design.
1. Ask for Barcode Verification and Aim for a High Quality Grade
Many customers and designers have heard that a barcode should “pass Grade A,” but they may not know exactly what that means.
Barcode quality is not determined simply by testing whether a phone or handheld scanner can read it once. A professional barcode verifier evaluates the printed barcode according to recognised quality parameters.
GS1 reports the overall quality of a linear barcode on a scale from 4.0 to 0.0, with 4.0 representing the highest quality. In general industry language, the highest level is commonly described as Grade A.
However, Grade A should not be understood as a universal minimum requirement for every barcode. The required passing grade depends on the barcode type, where it will be scanned, and the applicable customer or retail requirements.
For custom food labels, the practical approach is to ask the label printer whether barcode verification can be performed on the finished printed label. Achieving Grade A can be used as a strong quality-control target, while the required minimum should be confirmed according to the barcode’s actual application.
2. Create the Barcode Using a Single Black Colour
Designers often want every part of a food label to match the overall visual identity of the brand. As a result, some designers create barcodes using brand colours or build the black bars from several CMYK colours.
This may look attractive on the computer screen, but it creates unnecessary printing risks.
The safer approach is to create the barcode bars using one simple black ink colour. In CMYK artwork, this normally means using a single black separation rather than a four-colour rich black.
When barcode bars are made from several printing colours, even a small registration difference between the printing plates can affect the edges and widths of the bars. The barcode may still appear acceptable to the human eye, but its scanning performance may be reduced.
GS1 recommends black bars on a white background as the optimum combination and advises that barcode bars should be printed in a single ink colour rather than through a four-colour or other multiple-colour process.
For this reason, unless there is a specific technical requirement, keeping the barcode simple is normally the most reliable choice:
Single-black bars, a light background, and clear contrast.
3. Do Not Place the Barcode Too Close to the Label Edge
A barcode should not be positioned too close to the corners or die-cutting edge of a custom food label.
During label production, the printed material must be die-cut into its final shape. If the barcode is positioned too close to the cutting line, part of the bars or the clear area surrounding the barcode may be removed during die-cutting.
Even a small missing section can cause scanning problems.
The designer should therefore leave sufficient clearance between the barcode and the final label edge. The complete barcode, including the clear areas around it, should remain safely inside the finished label shape.
GS1 barcode placement guidance also advises against positioning a barcode too close to the edge of a package or container.
Leaving enough space is especially important when the food label has:
- Rounded corners
- An irregular custom shape
- A narrow area available for the barcode
- A barcode positioned near the bottom or side edge
It is much easier to adjust the barcode position during the design stage than to discover after printing that part of the barcode has been cut away.
4. Avoid Placing the Barcode on a Tightly Curved Area
Barcode placement also needs to consider the shape of the food container.
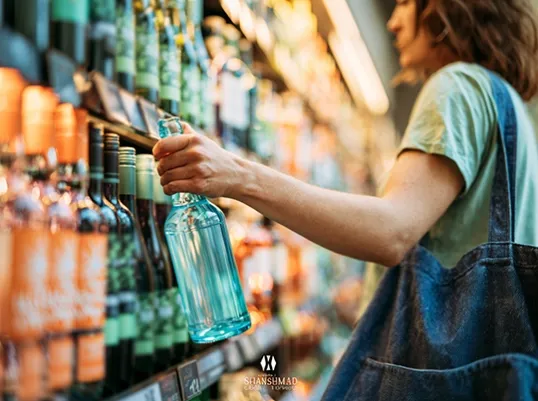
When a label is applied to a flat box or pouch, the entire barcode can usually remain visible to the scanner. However, when the label is applied to a round bottle, jar, can, or other cylindrical container, the surface curvature can affect barcode readability.
If the barcode is placed on a tightly curved section, the two ends of the barcode may wrap around the container. The scanner may then be unable to see the complete barcode at the same time.
GS1 guidance explains that on curved surfaces, the extremes of a barcode can disappear around the curve, particularly when the barcode is wide or the container has a tight radius.
Whenever possible, the designer should place the barcode on the flattest or least curved area of the bottle.
If the entire label wraps around the container, the barcode position should be selected according to the container diameter and the available flatter viewing area. The food label printer should also be consulted before the artwork is finalised.
Barcode Problems Should Be Prevented Before Printing
The most important lesson from this customer’s designer was not only the question they asked. It was when they asked it.
They did not wait until thousands of food labels had already been printed. They contacted the label printer during the artwork design stage.
That early communication gives the designer and printer an opportunity to confirm:
- Whether barcode verification will be required
- Whether the barcode is built using a single black colour
- Whether sufficient clearance has been left from the die-cutting edge
- Whether the barcode is positioned appropriately for the container shape
A professionally printed barcode starts with correctly prepared artwork.
The label printer can control the printing process, but the designer must first provide artwork that gives the barcode the best possible conditions for successful printing and scanning.
Need Help Reviewing Your Food Label Artwork?
If you are unsure whether the barcode position, colour setup, or artwork arrangement is suitable for label printing, contact AsiaBees before approving your final design.
Our team can review the printing-related details of your custom food label artwork before production.